This is a personal blog. All editorial content and projects are intellectual property of Snippets of Mendi. I receive financial compensation and material product from American Crafts to develop my craft posts, but all ideas and opinions are my own.
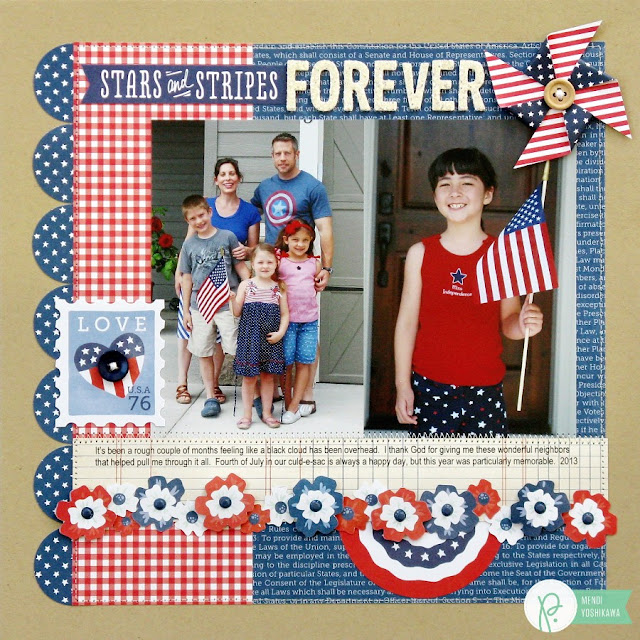
Hello there! How was your Fourth of July weekend? I'm popping in today to share a patriotic layout using Pebbles beautiful Americana collection which I shared awhile back on the Pebbles blog.
 This has to be one of my all time favorite collections from Pebbles. I just love the color palette and all of the great patterns and embellishments!

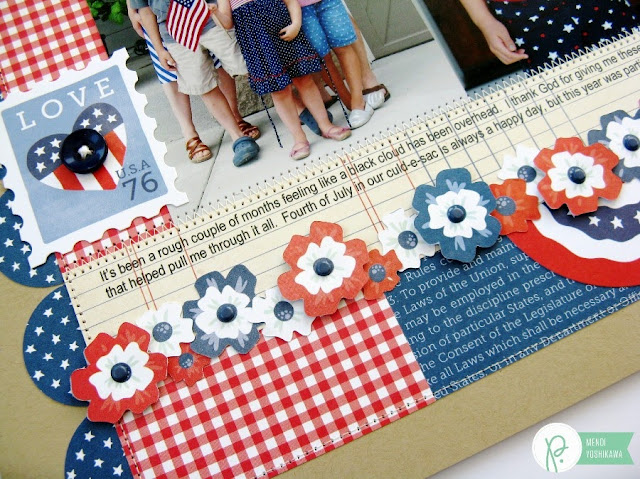
I thought it would be really fun to take one of the flower print patterned paper from the collection and cut the flowers out to form a floral border on my page.
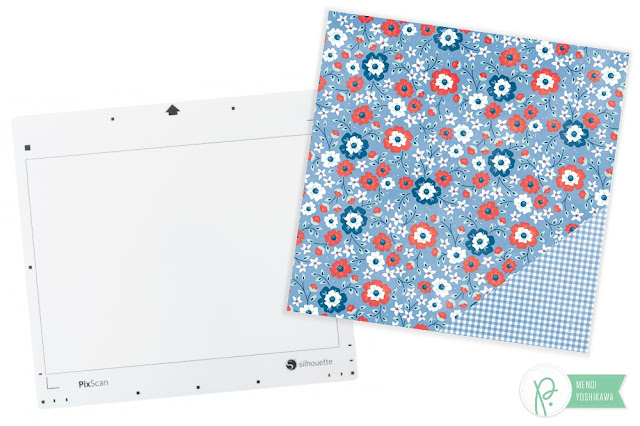
 To hand cut all the flowers would take quite a bit of time and patience so I decided to break out my Silhouette PixScan mat which allows you to take a photo of what you want to cut out and then find the outline of the printed shapes.
Rather than explain it in entirely with lengthy steps and screen shots I chose to make a video sharing my process which you can also view at YouTube. I know it's been a super long time since I've done one of these so I was feeling pretty rusty. ;)
While I won't go into all the details here, I will say that I started by clicking on the PixScan Icon within the newest Silhouette software (third icon from the top right) and then I clicked on the import from file button on the far right. From there I clicked on Camera Calibration and loaded Show Test Calibration Card which I printed out using a standard printer. This test is made up of a series of small dots. I then took a photo of the test paper with my camera, trying to physically crop in as close as possible with my lens. It also helps for this photo to be as bright as possible so I decided to then edit it for brightness and contrast (making sure not to play with the sizing).
I then cut down my floral patterned paper to 12" x 6" and adhered it to the top right-hand corner of my mat. From there I took another photo of my entire mat with the paper, making sure all the registration marks were showing in my photo. You can then edit your photo for brightness if you wish, but it is very important to not play with the dimensions because the two photos must be identical in that respect or it will not properly load your photo of the patterned paper. The last step in this sequence is to Import PixScan Image from File (or scanner).

From there you can use the trace features to find the outlines of your patterned paper that is now on the screen within the Silhouette software. By using the PixScan photo it already knows to look for the registration marks when you go to cut which is pretty awesome.
One last thing that I struggled with at first is it is extremely important to use the loading mark on your machine base by placing your mat just to the right of that guideline. If you fail to do this (like I did for several tries) it won't be able to find the registration marks to proceed with the cuts.
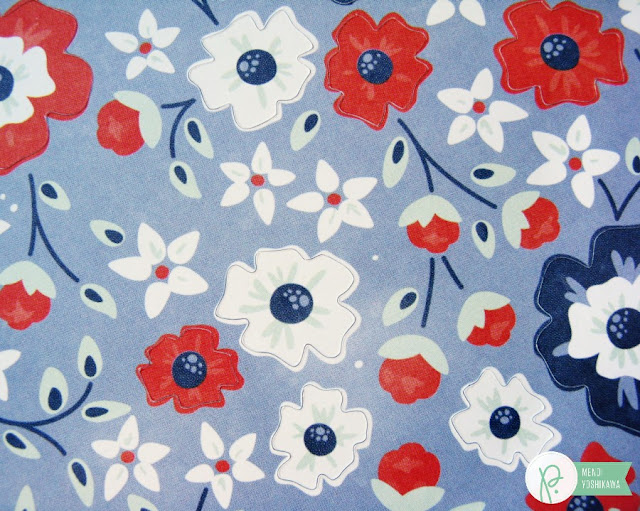
Here is a peek at what my paper looked like after cutting out. Pretty wonderful, right?
 Look at all these lovely flowers I was able to cut out in just a few minutes time! Oh the creative possibilities... I can't wait to turn more of my favorite papers into embellishments on my upcoming projects! I hope I've inspire you to look at your patterned papers in a brand new way!
 Here's one last look at how I arranged the flowers on my layout. I love that I have plenty left and ready for upcoming projects. :)
 Unfortunately the Americana collection is becoming pretty hard to come by outside of Etsy or Ebay, but I was still able to find a few of the supplies at the following stores...
Before I go I wanted to pass on a cool promo code. Scrapbook.com is offering free shipping for orders over $60 through July 10th at 11:59 pm PST using the code JULYSHIP. :)
Supplies Used (available at Scrapbook.com):
Supplies Used (available at Simon Says Stamp):
Hello there! How was your Fourth of July weekend? I'm popping in today to share a patriotic layout using Pebbles beautiful Americana collection which I shared awhile back on the Pebbles blog.
 This has to be one of my all time favorite collections from Pebbles. I just love the color palette and all of the great patterns and embellishments!
I thought it would be really fun to take one of the flower print patterned paper from the collection and cut the flowers out to form a floral border on my page.
 To hand cut all the flowers would take quite a bit of time and patience so I decided to break out my Silhouette PixScan mat which allows you to take a photo of what you want to cut out and then find the outline of the printed shapes.
 Rather than explain it in entirely with lengthy steps and screen shots I chose to make a video sharing my process which you can also view at YouTube. I know it's been a super long time since I've done one of these so I was feeling pretty rusty. ;)
While I won't go into all the details here, I will say that I started by clicking on the PixScan Icon within the newest Silhouette software (third icon from the top right) and then I clicked on the import from file button on the far right. From there I clicked on Camera Calibration and loaded Show Test Calibration Card which I printed out using a standard printer. This test is made up of a series of small dots. I then took a photo of the test paper with my camera, trying to physically crop in as close as possible with my lens. It also helps for this photo to be as bright as possible so I decided to then edit it for brightness and contrast (making sure not to play with the sizing).
I then cut down my floral patterned paper to 12" x 6" and adhered it to the top right-hand corner of my mat. From there I took another photo of my entire mat with the paper, making sure all the registration marks were showing in my photo. You can then edit your photo for brightness if you wish, but it is very important to not play with the dimensions because the two photos must be identical in that respect or it will not properly load your photo of the patterned paper. The last step in this sequence is to Import PixScan Image from File (or scanner).

From there you can use the trace features to find the outlines of your patterned paper that is now on the screen within the Silhouette software. By using the PixScan photo it already knows to look for the registration marks when you go to cut which is pretty awesome.
One last thing that I struggled with at first is it is extremely important to use the loading mark on your machine base by placing your mat just to the right of that guideline. If you fail to do this (like I did for several tries) it won't be able to find the registration marks to proceed with the cuts.
Here is a peek at what my paper looked like after cutting out. Pretty wonderful, right?
 Look at all these lovely flowers I was able to cut out in just a few minutes time! Oh the creative possibilities... I can't wait to turn more of my favorite papers into embellishments on my upcoming projects! I hope I've inspire you to look at your patterned papers in a brand new way!
  Here's one last look at how I arranged the flowers on my layout. I love that I have plenty left and ready for upcoming projects. :)
 Unfortunately the Americana collection is becoming pretty hard to come by outside of Etsy or Ebay, but I was still able to find a few of the supplies at the following stores...
Before I go I wanted to pass on a cool promo code. Scrapbook.com is offering free shipping for orders over $60 through July 10th at 11:59 pm PST using the code JULYSHIP. :)
Supplies Used (available at Scrapbook.com):
Supplies Used (available at Simon Says Stamp):


