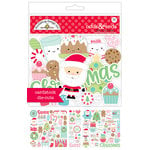
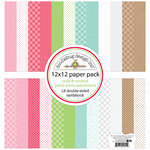
Hello there! I'm popping in today with a fun layout mixing a variety of cut files and cute embellishments from the darling Milk and Cookies collection.
I was so happy when I stumbled across these photos of my daughter getting ready for Santa a few year's back because they are a perfect compliment to these adorable papers! I started by opening up each of the cut files in my Silhouette software and then setting my screen to view them at 100%. I then could hold up my various die-cuts and stickers to decide on sizing and see how everything would fit together.
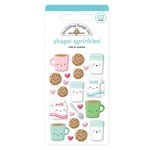
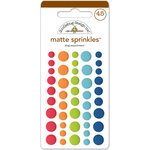
When all my pieces were cut and assembled, I added touches of stitching using my sewing machine and embellished my scene with various sprinkles to help the scene come alive! As a final finishing touch, I paired the Christmas word die-cut from the odds & ends pack with the Love Letter alphabet stickers to complete my title. I just love how it all came together and the over-sized 12x12 clipboard is the perfect frame to display my finished work of art.
To create my scene today, I used the following cut files:
- Milk & Cookies Fireplace- available HERE or HERE
- Milk & Cookies Santa In Chair- available HERE or HERE
- Milk & Cookies Tree- available HERE
I hope I've inspired you to mix some cut files with your other embellishments on a future project. It's seriously so much fun! ;)
Make sure to swing by the Doodlebug blog this month to see more great ideas for Holiday gifts. I've seen sneak peeks and my fellow teammates have dreamed up some darling ideas.
 Interested in the products I used to create my projects today? To make supplies easier for you to find, I have listed them below (affiliate links included).
Supplies Used (available at Scrapbook.com)
Hello there! I'm so happy to finally share a layout that I've been bubbling over with excitement about that I created for the Doodlebug blog today. We were challenged to create a project inspired from something we pinned on Pinterest.
I based my background on this amazing pillow and quilt pinned HERE. I really wish I liked sewing on fabric more because I think this design truly amazing. Instead I decided to re-create the cathedral style quilt using some of my favorite Doodlebug supplies and THIS Silhouette cutting file.
Here's an close up look at the 4-petal design. To fill my background with the fun Doodlebug papers from their Dragon Tails, Anchors Away & Polar Pals collections, I duplicated the overall background shape. I then broke apart the design to isolate one of the diamond shapes and created a small offset to have a shadow for the shape. I discarded the original diamond and used the "shadow" to cut out my different prints. By doing this, it gave me a small margin to adhere the pieces to the back of my die-cut background with a glue pen.
For my stitching, I discovered I could save quite a bit of time by sewing in a wavy line down each row, rather than trying to stitch around the 8 sides of the petals one by one. When all of my stitching was complete, I pulled my threads to the back of my page and taped them down before adhering the whole layout to another piece of royal blue cardstock.
I then temporarily adhered my buttons with a little liquid adhesive and stitched on my buttons with embroidery floss. To complete my page, I cut my title out using a purchased font cut from black vinyl and mounted on a shadow cut from white cardstock. I popped it up, along with my journaling strips with a bit of foam tape so they wouldn't blend in with the white die-cut design below.
This is a wonderful design for using up your scraps of paper or making use of your 6x6 paper pads! I hope I've inspired you to take a look at some of your Pinterest boards and see them in a new light. I know this little challenge has really inspired me to do this more often. It's a great way to get your mojo flowing!
Interested in the products I used to create my projects today? To make supplies easier for you to find, I have listed them below (affiliate links included).
Supplies Used (available at Scrapbook.com)
I'm sharing a fun idea on the Doodlebug blog today. For this project we were challenged to create a project inspired by a quote found on Pinterest.
I actually went looking for this particular quote to go with these fun photos I snapped of my daughter and I ended up being so inspired by the overall look of THIS PIN that I used it as the inspiration for my entire layout.
One of the things I liked best about the layout of the quote was how the words were perfectly spaced so I created a free cut file to share with all you today so you can create a layout of your own.
Download SVG file HERE
Download Silhouette file HERE
Want to know how I got my letters so straight? I used the negative space from my die-cut to help me adhere them. Using a little washi tape to hold my strip in place, I started by testing the first and last letters in the line. Once I had made sure they were positioned in the center of the line, I knew all the other pieces would line up perfectly and I set to work adhering them with a Zig glue pen.
It always feels magical lifting up the strip for the full reveal!
Thanks so much for stopping by. I hope I've inspired you to look at some of the word art around you with a fresh eye.
Interested in the products I used to create my projects today? To make supplies easier for you to find, I have listed them below (affiliate links included).
Supplies Used (available at Scrapbook.com)
So sorry for the repeat. I had to take down this blog post temporarily due to the cut file release date being delayed over in the Silhouette store. ;)
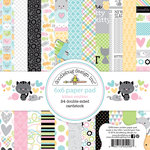
They are finally available (yay!) and I'm happy to be on the Doodlebug Blog today with a trio of shaped card using the newest Kitten Smitten cutting files available in the Silhouette store (along with the coordinating papers from the Kitten Smitten 6x6 paper pad).
To create my cards I sized them to fit within an 4.25" x 5.5" A2 sized envelope making none of the dimensions exceeded that size. I then cut two of the bases, scoring the back one along the top (parallel to the base) and adhered the two pieces together along the top.
It was so much fun personalizing my little kitties using different papers from the collection, inking and stitching around some of the kitties to help give them a little extra definition.
When I was done I stamped simple sentiments for each card using a small tag die I had on hand and tied on bows with coordinating colors of bakers twine. I also added a bit of glossy accents to the eyes and noses to help bring them to life.
I hope I've inspired you to take a closer look at the newest Doodlebug cutting files in the Silhouette store and at Lori Whitlock's shop. They have so many adorable ones!
Interested in the products I used to create my projects today? To make supplies easier for you to find, I have listed them below (affiliate links included).
Supplies Used (available at Scrapbook.com)