Hello there! Today I'm popping in with a post dedicated to embossing powder. I have been collecting and growing my embossing powder collection for the past 15 years. Over this time I have slowly discovered my favorite brands and whittled down my collection to remove overlapping colors since a single bottle of powder can last you a lifetime depending on the color.
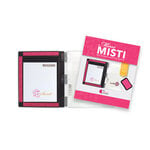
When I add new powders to my stash I have been in the habit of swiping my versamark ink on a piece of scratch cardstock, sprinkling the cardstock with the new powder, heating it up and then punching out a 1" circle to adhere to the top of the lid so I could see the actual colors at a glance. However as my collection has grown I've had to store them in different locations by brand making it harder to figure out which color I want and actually utilizing what has become a fairly vast collection. For this reason I was inspired to create a swatch binder like the one I have for my dye ink swatches using 20-pocket page inserts which hold 2x2 inch squares of cardstock. In my case I just used a solid oval stamp I had in my stash together with my Mini MISTI tool, but any solid stamp image will do. I printed the color names onto my 8-1/2 x 11 cardstock beforehand too, but a label maker would also work (which is what I probably will use for any new powders I add to my collection going forward).
I suffer from collector syndrome so when I discovered a love of Ranger and Hero Arts high quality embossing powders in recent years I felt the desire to collect them in all the pretty colors. I also have so many powders that I purchased early in my stamping journey, in addition to being gifted some and coming across small lots at Goodwill so some of these colors have been discontinued, but I thought I would share them here anyway because I know for me when I'm trying to purchase things like this online (including ebay) I really want to see how the product will perform beforehand and compare with powders I might already own. I know there were quite a few of the "clear sparkle" powders that I was really in the dark about when I bought them because all I had was a picture of the bottle and a name to go off of. Even doing this single day project I was shocked by how some of these looked when embossed on white vs black paper. It felt like a magic trick. It's also really helpful to know before ruining a half completed project if the sparkly powders have a clear base or a milky pearlescent base.

I was surprised to realize when doing this project that I had quite a few powders in my stash were identical with just different names by different manufacturers. For this batch I will note that the Silver Pearl and White Satin Pearl are the exact same formula with just different names. For that reason I chose to only heat emboss one of them onto the black cardstock since I was feeling rather certain they would perform identically.

In my pictures I overlapped my horizontal close-up images by one row of swatches, but I went ahead and kept it without cropping them out since I thought it might be nice to see the powders at different angles since they can appear a bit different depending on how they catch the light. I love having a number of different metallic options to choose from! They feel like really good versatile basics when it comes to embossing powder and can match so many different projects. In this batch I would say the Hero Arts Copper and Ranger Copper were also nearly identical. They both are nice quality, fine powders that provide good coverage and melt very smoothly.

Up next is my set of "clear" and "sparkle" powders. These in particular are VERY difficult to distinguish between when just looking at them in the jar. I had heat embossed my swatches on the jar lids using white cardstock, but it wasn't until I heat embossed them on black cardstock that I really could see their differences. The black cardstock really helps bring out the color of the sparkles and shows off if they were mixed with a clear, white or pearlized background which really affects how I would use them.

One of my favorite basic clear sparkle powders is Ranger's Holographic Embossing Powder. Every millimeter of embossed space is filled with gorgeous sparkles. The iridescent sparkles alternate between a pinkish-orange and green depending on how the light hits it.
It tough to tell here, but the Stampendous Star Dust Powder and Judikins Iridescent Sparkle are very close to identical. It was just announced that Stampendous will be merging with Spellbinders so I'm hoping they will continue producing their line of gorgeous embossing powders as I really do love the ones I have.

The Judikins Iridescent Sparkle Embossing Powder is a very giant jar for only a slightly higher price point and will literally last you a lifetime of making endless sparkly cards. It is a great basic clear glitter powder that is perfect for so many purposes, particularly for your snow, bridal and princess themed projects. It's hard to tell in the example using white cardstock, but the iridescent glitter doesn't lean a particular color direction like some of the others. It has faint hints of pink, blue and yellow which you can see depending on the angle (compare this photo with the photo up above).
The Ranger Bridal Tinsel stands out as unique because rather than having a clear background like so many of the sparkle embossing powders, the sparkles are mixed with a white pearlescent powder. It's super pretty and really shines (no pun intended) when used with darker papers.
The Ranger Frosted Crystal is also very unique. It has no sparkles, but it doesn't heat up smoothly like a clear embossing powder either. Like it's name suggests it has a textured frosted glass appearance. I'm excited to try applying this for my winter scene style cards--I think it would be perfect for an ice skating rink!
Ranger's Cottontail Embossing Powder and Hero Arts White Puff Embossing Powder are also identical products so if you already have one and were considering also buying the other to see if they would have slightly different properties (like I thought they might) I can save you the money. They are both fabulous. They have a puffy, slightly raised, chalky look to them. I'm thinking it would be great to use with a VersaMarker Clear Embossing Pen to add snowfall to the edges of my holiday scene cards. These powders would also be perfect for giving critters fluffy fur, like a bunny tail for Easter.
The Snowflake Tinsel Embossing Powder is also quite unique. It's a silver glitter mixed with a white embossing powder. It's another one that was hard to appreciate the differences just looking at the bottle. This one would be great for stamping bold sparkly greetings at Christmas on darker cardstocks!
This is just a "catch all" page of swatches that didn't fit on my other pages. I have a row of some of the hot pink embossing powders, my colored glitter / tinsel powders, black powders and silver powders.
When I was first getting started with stamping, American Crafts was introducing their Zing! Embossing Powders. They had happy bright colors to match their paper collections (which I also still have in my stash) so I'm glad I bought them, but it wasn't until I tried some other brands that I realized they really aren't the same quality as the others. They have since discontinued their powders so you would have to pick them up on Ebay or at garage sales now. While they don't heat up terrible, anytime I had a similar color with one of the higher quality brands I decided I would part with the Zing powder in that same color. With that in mind, many of the swatches in this photo have been discontinued (with the exception of the Magenta and Cactus Flower colors).
The Hero Arts Blue Pearl was my very first embossing powder I ever purchased. I want to say it's from the early to mid 90's as it's the only embossing powder I have that comes in a container resembling an ink refill bottle. For many years everything I stamped and heat embossed was using that one powder (which makes me chuckle to consider now), but as you can see when heat embossed on white cardstock it doesn't really look all that blue and only has an opalescent shine. In fact it's difficult to see the blue tint at all so imagine my surprise when I heat it up on the black cardstock this weekend and it screams blue. I am still don't understand it. It feels like a cool magic trick! This 30-year old powder just goes to show that embossing powders really can last a lifetime as long as they are sealed up tightly and kept in a cool, dry place.
Ranger's Watering Can Embossing Powder is a perfect opaque gray powder. It's great when Black feels too dark and too bold. For an ultra fine Black embossing powder I think Brutus Monroe's Raven Powder is one of the best.
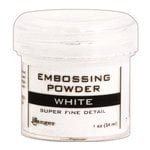
When in doubt and there is a choice between regular and ultra / super fine / detail (the name changes depending on the manufacturer), I personally always prefer the finer detail powders. They just smooth out so beautifully and don't have the chunky look. They also work great for smaller sentiments and detailed outline images.
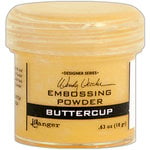
Switching gears I have grouped my colorful opaque powders by the color wheel in rainbow order. The majority of these are by Ranger because they have so many yummy colors to choose from and they just heat up so beautifully, but I also have a few by WOW! because it's hard to beat their reasonable price point and they offer some unique colors that filled gaps in my stash. The WOW jars are smaller, but in general I'm never going to use a full size jar in my lifetime for some of these colors anyway. A little really goes a long way.I think this angled photo illustrates the quality of Ranger's embossing powders and how well they cover and smooth out when heat up compared to the more gritty texture of the older American Crafts Zing powders. If I had been patient enough to stamp my swatches with a second layer of VersaMark ink before sprinkling with powder, they probably would have smoothed out even more.
It appears WOW regularly discontinues older colors and introduces new ones to keep their customers coming back to add to their stashes so all the colors I have here are no longer available, but Simon carries so many gorgeous new colors of theirs which you can see HERE.
Next up is the teals, blues and purples...
I just adore these gorgeous shades of blue! Seeing them all here, I'm thinking it would be fun to create an ombre background where I sprinkled them in rows and then gently shake the paper to have the rows blend together for a fun summer themed ocean card.
Thank you so much for hanging out with me today. I hope you've found this post helpful and it will inspire you organize your own stash by creating swatches. I know it has given me a new appreciation for the powders I have, inspired me to pick up a couple new shades where I see gaps and it has inspired me to incorporate them more regularly in my crafting. I really want to challenge myself to get out of my comfort zone and to try more creative techniques with them!
Fun Parting Fact: Don't forget embossing powders aren't just for stamping. They are also a great way to change the color of brads and other metal embellishments by pressing them in a Versamark ink pad, and holding with tweezers to heat with colored powders to create new custom colors to match your projects.
Interested in the products I featured today? To make supplies easier for you to find, I have listed them below (affiliate links included).