I'm so excited to have the opportunity to test drive the new Tonic Stamp Platform by Tim Holtz! I came across their booth just as Creativation was coming to a close and I was immediately impressed by it's weight and heavy duty nature. While I love my other stamping tools, I've experienced some form of cracking on all my acrylic lids, however at 5/16" thick this looks like it will stand up to a beating. ;)
I was brainstorming what type of project I would like to do with it for my post today and I realized the large size makes it ideal for working with so many of my 6x6 background stamps that I've neglected. I don't know about you, but I have issues with getting good clean impressions with large background stamps, even when using them on their own without a block. I frequently have issues with getting complete coverage or dropping my stamp in the middle of my cardstock accidentally due to their bulky size.
The other issue with this type of stamp is you generally have one shot to get it right. Forget trying to stamp it repeatedly in different colors.
Well, with the new Tonic Stamp Platform, I was able to stamp it repeatedly with a rainbow of colors. Normally I would have to muddy my ink colors on their stamp pads by blending the inks on the rubber stamp itself, but by using the platform, I was able to ink a portion, stamp it and clean it off before applying my next color. I love that I was able to repeat these steps as many times as needed until I had the coverage and blending I was after.
When I was done with my stamping, I thought it would be cool to use those same ink colors with my favorite jumbo daubers to sponge on a soft rainbow background over the stamped polka-dots.
I generally have one jumbo dauber dedicated to each color family. I use my daubers A LOT so they take a ton of abuse from me (as you can see), but I truly love the smooth blended results I get from them.
Another feature I love about the Tonic stamp platform is how easy it is to switch between clear and cling stamps. As you can see by this picture the lid easily lifts out of it's track and can flipped over. They've printed on the lid in red in the top left corner to help you know which side to use for which. ;)
Here's a full look at my finished card. I paired my background with some fun new layering stamps I'm sharing over on the Sunny Studio blog today which are available for purchase on Friday morning. I hope you will stop by to join in the festivities over there. I'm giving away a new $25 gift card to Sunny Studio store every day this week for a total of five chance to win. :)

Just to recap here's my favorite features of the new Tonic Stamp Platform:
- Heavy duty design with thick 5/16" acrylic lid
- 1/4" etched grid on lid that won't wear off
- Lid easily flips for use with both clear and red rubber cling stamps
- Large 8.5" x 8.5" Stamp base is fully magnetic
- Comes with full foam anti-slip base and two strong magnets
- The open edge design allows for use on larger projects like stamping on 12x12 scrapbook pages
- A competitive retail price
While I may not pull this out for small jobs like stamping a card sentiment straight (even though it's fully capable of doing the job) this is a welcome addition to my craft tool arsenal. I'm looking forward to trying it out on my scrapbook pages next!
Look for the stamp platform to hit Scrapbook.com and other stores sometime later this month. ;)

Interested in the products I used to create my projects today? To make supplies easier for you to find, I have listed them below (affiliate links included).
The exact Impression Obession polka dot stamp I used seems to be discontinued so I have linked up several others that I think would be really fun with this technique.
Supplies Used (available at Scrapbook.com)

Hello there! I'm popping in today with another peek into my crafty "woman cave" with a few of my favorite ways to stay organized. The Doodlebug Team is sharing their rooms over the next two weeks and I thought I would join in the fun. Just to keep things real, I must confess that I didn't have time to clean my space for the post so I've stolen these first few photos from one of my better days a couple years ago when I had completely reorganized. While I do like a well organized space, my room hasn't looked this clean since then. ;)
Snapshot #1: This first shot shows a little counter to the left of my entrance with a craft sink which just happens to be my favorite addition to my space. It's been wonderful for cleaning up paint and ink projects. My family likes to joke that all I need is a micro/fridge with a cot and I just might never leave. ;)
Snapshot #2: The next photo shows my custom made movable island that has (4) 12x12 hanging file drawers on one side and shallow 12" shelves on the backside. The cabinets to the right, along the wall make up my die-cutting station. I love that I'm able to store all my dies in the cabinets there within arm's reach.
Snapshot #3: The next photo moves to the right of my die-cutting station and is the place where I spend the majority of my day. It was important to me that my counters be 24" deep to give me extra storage space along the wall and still have room to work at my computer and assemble my cards & scrapbook pages when the keyboard is pushed out of the way.
Shapshot #4: Moving along to the right again I have another seating area to keep my sewing machine out. For those who know me, I love to sew on my paper craft projects so after years of balancing it on my washing machine and standing up to sew, it was really important to me to have a dedicated space for my machine. I also store all my inks and stamping supplies in the cabinets in that corner (which due to my addiction has doubled in size since these photos were taken).

The last storage spot in my space that I don't have a good picture for is two side-by-side closets to the right of my room entrance. My closet doors swing open so I have added the Elfa Pantry Door Organizers from The Container Store to the insides where they can be hidden away. I'm seriously in love! They can be customized in a dozen different ways--I was able to fit 8 hanging wire baskets on mine in three different size). They're perfect for fitting extra embellishments and maximizing tight spaces that would otherwise be wasted.
I like to use Doodlebug's Button Keeper jars to hold many of my small basic Doodlbug embellishments. I sort them by color family and am really happy with how much space they save. It's truly amazing how much extra room the packages were taking up and how much easier it is to dump them out in my hand and just pick the colors I'm looking for. They also are a great fit with my Elfa medium basket.
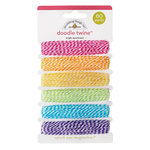
I'm using some some larger plastic jars that I got at Michaels several years ago to hold my Doodle twine (the Droppar jars from IKEA would also work nicely). They are a great size for so many things (including sorting washi tape by color) and I am able to perfectly fit four of them in one of my large Elfa utility baskets.
Next up, I have some storage solutions using some of my favorite Interdesign / Linus clear acylic storage bins. Most of these have been designed with the kitchen and refrigerator in my mind, but they are wonderful at organizing so much more. I can't go to Ross, Marshalls or TJMaxx anymore without scouting to see if they got some new ones in stock. I love to use THIS large 8" x 4" x 14.5" bin to hold my Doodlebug 6x6 Paper Pads. I counted and I'm able to fit in 55 pads in one tidy space!
To keep my loose scraps together with their coordinating pads I use THESE clear party favor bags which I trim down to 6" long and tuck under the front cover of each pad.

For my 6x12 Alphabet and Icon Cardstock Stickers, I use THIS 4" x 4" x 14.5" Freezer Bin. It's a great length and they are easy to sort by color and theme. Once again, I love that I am able to fit so much in a tight space and still quickly find exactly what I'm after.
Up next is a tip for storing Doodle Pops. Hello my name is Mendi and I have a Doodle Pop addiction. Linus Drawer organizers are so perfect for reining them in. For my little dividers, I cut up some plastic file folders and rounded the corners with my corner chomper and then labeled them with my Brother label maker (which was completely inspired by how Jennifer McGuire stores her clear stamps). ;)

To keep my Doodlebug sprinkles, jewels and pearls tidy I love THIS divided organizer. It's just the right size for these and would work well for a variety of small embellishment packages.
Phew! Are you still with me? Thank you for joining me today. I feel extremely blessed to have this special space after more than a decade of working from our dining room table (and storing my items in every room, but the bathroom). With that in mind, I'm a firm believer in using whatever space you have to the fullest so I hope some of these organizational ideas will work for you whether you have a dedicated room or work from your kitchen.
To see my previous "space" you can check out one of my very first blog posts I shared HERE (it's such a funny blast from the past for me). While my surroundings have changed I still love and use all of the storage items I shared way back when. ;)
Big Hugs!
I thought I would pop in to share a pretty sweet sale that Sizzix has going on right now. Over 1800 items and many of them are 75 to 80% off retail.
You can click on the photo above to take you to the sales page or shop HERE (affiliate links included).
Happy Shopping!
This week the Doodlebug team is showcasing fun uses for their new collectible pins. If you haven't seen these in person, they are really nice, heavy weight pins similar in quality to Disney pins.
I decided to show how they're the perfect embellishment to add to the center of your bows and packages. I love that they not only dress up your packages, but the recipient can enjoy them afterwards. I created my first bag using papers from Spring Things and the We R Memory Keeper Gift Bag Punch Board. I then created a band along the top using a coordinating strip of border paper. Doodlebug's chunky twine makes perfect handles!
To create my little DIY bow, I wrapped Doodlebug's original bakers twine around several fingers, tied a knot around the center and then fluffed it out. The strings from the center knot can then help you fasten it to your bag.
For my next bag I used papers from Doodlebug's Easter Express collection, selecting the bunny paper to match my bunny pin.
For my last gift, I created a pillow box using more papers from Spring Things along with the We R Memory Keeper Pillow Box Punch Board. In order for my pin to sit flush with my box, I die-cut a small 1/2" circle from the center of my box before assembling it so that I could have a space to insert my pin. These are a really fun way to present a gift card!
I hope I've inspired you to pick up a few of these to add to your gifts. I must warn you though that once you have them in your hot little hands they may be pretty tough to part with. ;)
Interested in the products I used to create my projects today? To make supplies easier for you to find, I have listed them below (affiliate links included).
Supplies Used (available at Scrapbook.com)