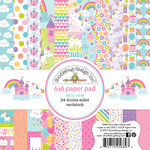
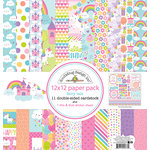
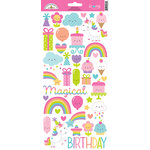
Hello there! Popping in a with a special sale today only at Scrapbook.com on all Doodlebug products. Everything is currently 20 to 50% off automatically through midnight tonight (PST). Visit HERE to see all the cool new products.
In addition to the Doodlebug sale they have many other deals going on which you can see HERE including one (1) FREE Gelatos with every shippable order! Happy Shopping!

Thursday, June 22, 2017
Wednesday, June 21, 2017
Doodlebug Yankee Doodle Cards & Scrapbook Layout
Hello there! It's my turn on the Doodlebug blog and today I'm sharing some fun projects featuring the adorable new Yankee Doodle collection. I don't know about you, but the Doodlebug's fourth of July inspired paper and embellishments win me over every time. There's just something so happy about the red, white and blue color scheme, don't you think?
To start off I thought I would create some everyday cards that are perfect for all year 'round. I'm not very good about sending out holiday cards outside of Christmas, but I can always use some good basic cards to grab on the go when I want to let someone know I am thinking of them.
For my first card I created a thank you card pairing the borders from the pint sized treasures paper with a sentiment strip from the summer celebrations paper. I then added a clear acetate bicycle die-cut from the odds & ends pack and embellished it with some red matte sprinkles from the collection. My final touch with a cute dog sprinkle from the Puppy Love collection.
For my next card I cut another sentiment strip from that same summer celebrations paper and then tucked some banners below it using scraps from the 6x6 paper pad that I had left over from previous projects. I completed it with a simple stitch around the edge with my sewing machine and a darling house die-cut from the odds & ends set.
For my last card I wanted to mimic the shape of the cute Doodle Pop pocket full of posies sticker so I turned to some Fishtail banner dies in my stash to cut the bottom edge of my card base. As a final finishing touch I added some white matte sprinkles to the centers of the posies on the border strips going down each side of my card.
As one last project for the day, I created a fourth of July layout using this sweet collection.

Interested in the products I used to create my projects today? To make supplies easier for you to find, I have listed them below (affiliate links included).
Supplies Used (available at Scrapbook.com)
To start off I thought I would create some everyday cards that are perfect for all year 'round. I'm not very good about sending out holiday cards outside of Christmas, but I can always use some good basic cards to grab on the go when I want to let someone know I am thinking of them.
For my first card I created a thank you card pairing the borders from the pint sized treasures paper with a sentiment strip from the summer celebrations paper. I then added a clear acetate bicycle die-cut from the odds & ends pack and embellished it with some red matte sprinkles from the collection. My final touch with a cute dog sprinkle from the Puppy Love collection.
For my next card I cut another sentiment strip from that same summer celebrations paper and then tucked some banners below it using scraps from the 6x6 paper pad that I had left over from previous projects. I completed it with a simple stitch around the edge with my sewing machine and a darling house die-cut from the odds & ends set.
For my last card I wanted to mimic the shape of the cute Doodle Pop pocket full of posies sticker so I turned to some Fishtail banner dies in my stash to cut the bottom edge of my card base. As a final finishing touch I added some white matte sprinkles to the centers of the posies on the border strips going down each side of my card.
As one last project for the day, I created a fourth of July layout using this sweet collection.
I used all the die-cut stars from the odds & ends pack to form a diagonal trail across my page and to help direct the viewers eye from one side to the other.
I hope I have inspired you to take a closer look at this happy collection. I love the unexpected touches of green and I think you will find that it works beautifully way beyond it's intended holiday. :)

Interested in the products I used to create my projects today? To make supplies easier for you to find, I have listed them below (affiliate links included).
Supplies Used (available at Scrapbook.com)
Wednesday, June 7, 2017
Doodlebug Pinterest Inspired Quilt Background Scrapbook Layout
Hello there! I'm so happy to finally share a layout that I've been bubbling over with excitement about that I created for the Doodlebug blog today. We were challenged to create a project inspired from something we pinned on Pinterest.
I based my background on this amazing pillow and quilt pinned HERE. I really wish I liked sewing on fabric more because I think this design truly amazing. Instead I decided to re-create the cathedral style quilt using some of my favorite Doodlebug supplies and THIS Silhouette cutting file.
Here's an close up look at the 4-petal design. To fill my background with the fun Doodlebug papers from their Dragon Tails, Anchors Away & Polar Pals collections, I duplicated the overall background shape. I then broke apart the design to isolate one of the diamond shapes and created a small offset to have a shadow for the shape. I discarded the original diamond and used the "shadow" to cut out my different prints. By doing this, it gave me a small margin to adhere the pieces to the back of my die-cut background with a glue pen.
For my stitching, I discovered I could save quite a bit of time by sewing in a wavy line down each row, rather than trying to stitch around the 8 sides of the petals one by one. When all of my stitching was complete, I pulled my threads to the back of my page and taped them down before adhering the whole layout to another piece of royal blue cardstock.
I then temporarily adhered my buttons with a little liquid adhesive and stitched on my buttons with embroidery floss. To complete my page, I cut my title out using a purchased font cut from black vinyl and mounted on a shadow cut from white cardstock. I popped it up, along with my journaling strips with a bit of foam tape so they wouldn't blend in with the white die-cut design below.
This is a wonderful design for using up your scraps of paper or making use of your 6x6 paper pads! I hope I've inspired you to take a look at some of your Pinterest boards and see them in a new light. I know this little challenge has really inspired me to do this more often. It's a great way to get your mojo flowing!

Interested in the products I used to create my projects today? To make supplies easier for you to find, I have listed them below (affiliate links included).
Supplies Used (available at Scrapbook.com)
I based my background on this amazing pillow and quilt pinned HERE. I really wish I liked sewing on fabric more because I think this design truly amazing. Instead I decided to re-create the cathedral style quilt using some of my favorite Doodlebug supplies and THIS Silhouette cutting file.
Here's an close up look at the 4-petal design. To fill my background with the fun Doodlebug papers from their Dragon Tails, Anchors Away & Polar Pals collections, I duplicated the overall background shape. I then broke apart the design to isolate one of the diamond shapes and created a small offset to have a shadow for the shape. I discarded the original diamond and used the "shadow" to cut out my different prints. By doing this, it gave me a small margin to adhere the pieces to the back of my die-cut background with a glue pen.
For my stitching, I discovered I could save quite a bit of time by sewing in a wavy line down each row, rather than trying to stitch around the 8 sides of the petals one by one. When all of my stitching was complete, I pulled my threads to the back of my page and taped them down before adhering the whole layout to another piece of royal blue cardstock.

Interested in the products I used to create my projects today? To make supplies easier for you to find, I have listed them below (affiliate links included).
Supplies Used (available at Scrapbook.com)
Subscribe to:
Posts (Atom)