Wednesday, November 30, 2016

Doodlebug Here Comes Santa Claus Christmas Gift Tags

Can you hardly believe it?!  Two different projects in one week!  I'm sharing a second project over on the Doodlebug blog today.  This time I have some quick and easy ideas for Holiday gift tags using Doodlebug's adorable Here Comes Santa Claus collection.


Doodlebug Design: Here Comes Santa Claus Christmas Holiday Gift Tags by Mendi Yoshikawa

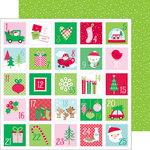
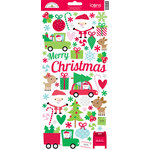
First is a set of gift tags using a die by Papertrey Ink and some cute icon stickers and embellishments from the collection. I love creating some extra special tags for my Mom and Sisters each year.


Doodlebug Design: Here Comes Santa Claus Christmas Holiday Gift Tags by Mendi Yoshikawa

For my second set of tags I created some simple hanging tags using a circle tag die by Lawn Fawn and some Doodle twine.  I kept these really simple to make mass production a breeze.  I embellished one side by punching circles from a piece of patterned paper found in the 6x6 pad from the collection.  On the back, I punched another circle from white cardstock and added my "to" and "from".


Doodlebug Design: Here Comes Santa Claus Christmas Holiday Gift Tags by Mendi Yoshikawa

My last set of tags is probably the most simple of the bunch, but they are the ones I will reach for the most.  I die-cut the circle tag from a number of different patterned papers and another basic circle from white cardstock.  I then stamped a simple "to" and "from" before adding a little bow with liquid adhesive.


Doodlebug Design: Here Comes Santa Claus Christmas Holiday Gift Tags by Mendi Yoshikawa

When I was done, I went through and added score tape to the back of each tag so when I'm wrapping gifts I can just peel and stick.  Love that I was able to create all my tags for the season in an evening.  


Doodlebug Design: Here Comes Santa Claus Christmas Holiday Gift Tags by Mendi Yoshikawa

I hope I've inspired you in your holiday crafting.  Why not invite some girlfriends over, put on some Christmas music and have a fun evening of making holiday tags together?


Interested in the products I used to create my projects today?  To make supplies easier for you to find, I have listed them below (affiliate links included). 

Supplies Used (available at Scrapbook.com)

Wednesday, November 16, 2016

Doodlebug Flea Market Home Decor Fall Thankful Banner

Hi there!  I'm up on the Doodlebug blog with a fun home decor project perfect for the fall and Thanksgiving season using their adorable Flea Market collection and the darling new coordinating Silhouette cut files!

Doodlebug Design Flea Market Thankful Denim Fall Banner by Mendi Yoshikawa


Last year I picked up this plain denim banner at Michaels that was just waiting for the perfect project to use it on.  While you might not be able to find it there anymore, you could easily recreate it using THIS cutting file found in the Silhouette store) along with a fabric blade.


Doodlebug Design Flea Market Thankful Denim Fall Banner by Mendi Yoshikawa


Step 1: I started by sizing the pocket cutting file to 5 x 5.5" and duplicating it 7 more times within my Silhouette software so that I could design my overall banner with all the pieces lined up together.

Doodlebug Design Flea Market Thankful Denim Fall Banner by Mendi Yoshikawa


Step 2: I then cut the word "Thankful" from white cardstock at 2-3/4" high.  I then created an offset at .1 to form my shadow and cut it from the peacock colored tone-on-tone patterned paper from the Flea Market Collection.


Doodlebug Design Flea Market Thankful Denim Fall Banner by Mendi Yoshikawa


Step 3: Using the banner I had laid out, I then took all the shapes and started layering the individual pieces together to form each image and grouped them together to make them easier to move around and resize.  By having my 8 banner pieces laid out I could get a feel for how I wanted my finished banner to look.


Doodlebug Design Flea Market Thankful Denim Fall Banner by Mendi Yoshikawa


Step 4: I then duplicated all those shapes (so I didn't have to disrupt my master copy) and started ungrouping them, sorting them by color.  This allowed me to cut all my green shapes at once, all my orange shapes, etc. to save on time and paper.
Doodlebug Design Flea Market Thankful Denim Fall Banner by Mendi Yoshikawa

Step 5: When all my shapes had been cut, I stitched around some of the larger shapes on ,y sewing machine before adhering them together for an extra decorative touch.

Doodlebug Design Flea Market Thankful Denim Fall Banner by Mendi Yoshikawa


Step 6: When I was done assembling all my shapes I adhered them to my denim banner with my favorite Beacon's 3-in-1 liquid adhesive.  


Doodlebug Design Flea Market Thankful Denim Fall Banner by Mendi Yoshikawa


Step 7: When everything had been glued down, I filled in a few images using the stickers and odds & ends die-cuts from the Flea Market collection.


Doodlebug Design Flea Market Thankful Denim Fall Banner by Mendi Yoshikawa


Step 8: As a final finishing touch, I adhered my banner pieces together with a 7" length of ribbon which I looped together and adhered on itself in the back.  I then glued the loop together with a little more liquid adhesive in the center, topped with my over-sized leaf die-cuts and a ribbon bow.


Doodlebug Design Flea Market Thankful Denim Fall Banner by Mendi Yoshikawa


I hope you've enjoyed this project and are inspired to create a home decor project of your own.  

Doodlebug Silhouette cutting files Used:


Interested in the other products I used to create my projects today?  To make supplies easier for you to find, I have listed them below (affiliate links included). 

Supplies Used (available at Scrapbook.com)

Thursday, November 10, 2016

Lawn Fawn Autumn Cards For Thanksgiving

Hello there friends!

Sorry it's been so long since I've stopped in to say hi.  I just barely finished creating a TON of cards for the Sunny Studio release before it was time to switch gears and start designing the Spring release.  Needless to say I barely have time to do laundry or clean my kitchen  anymore (just ask hubby) so this poor blog has slipped through the cracks more than I would like. ;)

I thought I would pop in and share some cards I created for a card challenge for a local craft store club I attend each month.  They give each member a small packet of supplies and the challenge is us to design a card that uses a little bit of everything we're given. 

This is what I came up with using several of my favorite Lawn Fawn sets for fall (including the pie & fork from their retired "Happy Feast" set)...

Lawn Fawn Autumn Thanksgiving Cards by Mendi Yoshikawa (using Happy Harvest, Happy Feast & Cutie Pie)


In our packet we were given the following this month:
  • 3x4 Sage Polka-dot Paper
  • 6x6 Orange Cardstock
  • 12" of Brown Twine
  • 1/2 of a Brown Doily
  • Die-cut tag
When I was done, I still had some extra stamped images I had colored along with some extra doilies (since they were stuck together) and some small scraps of the other pieces so I decided to create a second card.  This time I was actually able to use all 5 supplies on my card by including the tag.  ;)  

I hid the two halves of my doily with the polka-dot strip in the center, which is also two separate pieces with the gap hidden by the tag.  
Lawn Fawn Autumn Thanksgiving Cards by Mendi Yoshikawa (using Happy Harvest, Happy Feast & Cutie Pie)


It felt really good to use up all my scraps and create two fun cards in the process.  


I must say this is a super fun challenge to give your creative juices a jump start.  What's on your desk today?  Why not grab a handful of random items and see what you come up with.  ;)


Interested in the products I used to create my projects today?  To make supplies easier for you to find, I have listed them below (affiliate links included). 

Supplies Used (available at Simon Says Stamp)

Use the promo code HARVEST to take $5 off your purchase of $5 or more through November 21, 2016.  ;)
Related Posts Plugin for WordPress, Blogger...